An Introduction to Sailing Terms!
If you’ve ever been on a boat/ship, you’d be sure to notice that there are certain lingo that the skipper uses to communicate with his/her crew. While this lingo is indeed part of the English language, the terms may sound relatively technical or foreign to most people. We use these terms to convey a wide array of things on board, from directions, to objects, to instructions!
Being well versed with these terms is crucial, especially when out at sea. Out at sea, when everyone needs to be on a constant lookout for different (and sometimes unexpected) elements, using the right terms and a common language ensures smooth communication from one person to the other, and prevents a situation of “Can you pull that thingy over there? “What thingy” “The rope!” “Which rope?” “Blue rope!” “So many blue ropes, which one? Pull where? How to pull?” (No joke, we all started blur like this, got shouted and screamed at, until we get schooled on these sailing terms.)
If you’re NEW TO BOATING, or if you’re learning how to sail, or even if you’re JUST curious — here’s a list of simple sailing terms to get you started!
(Disclaimer: We’re breaking down technical terms into easy-to-understand average you-and-me layman terms for newbies like we once were. This list by no means will get you certified as a professional sailor.)
Directional Commands: Port / Starboard / bow / stern
In our daily lives, directional terms such as “Left”, “Right”, “Front”, and “Back” are used on a daily basis. For instance, if you’re at the office, we use words like "pass me the document on your left“, or if you’re on the road listening to the GPS, “Turn right at the junction”.
In nautical language, these terms are replaced by:
If you’re wondering why there is a need to replace simple words with complicated terms, it is because these terms are independent on where the person is facing.
Port side, will always refer to the left side of the vessel. Same goes to the Starboard side. This allows orders and information to be given unambiguously, without needing to know which way any particular crew member is facing. For a small boat like ours, we can afford to say the terms “left” and “right”. However, on a bigger vessel, such information may be communicated via the radio system, from the boat’s crew, or even from other boats.
For instance, if there is a vessel that is on a collision course, instead of saying “There is a boat on your left, coming from the back”, we can immediately alert the skipper by saying, “There is a boat on your port quarter”. It will instantly be very clear to the skipper where the other vessel is.
Sailing: Main sail / Head Sail
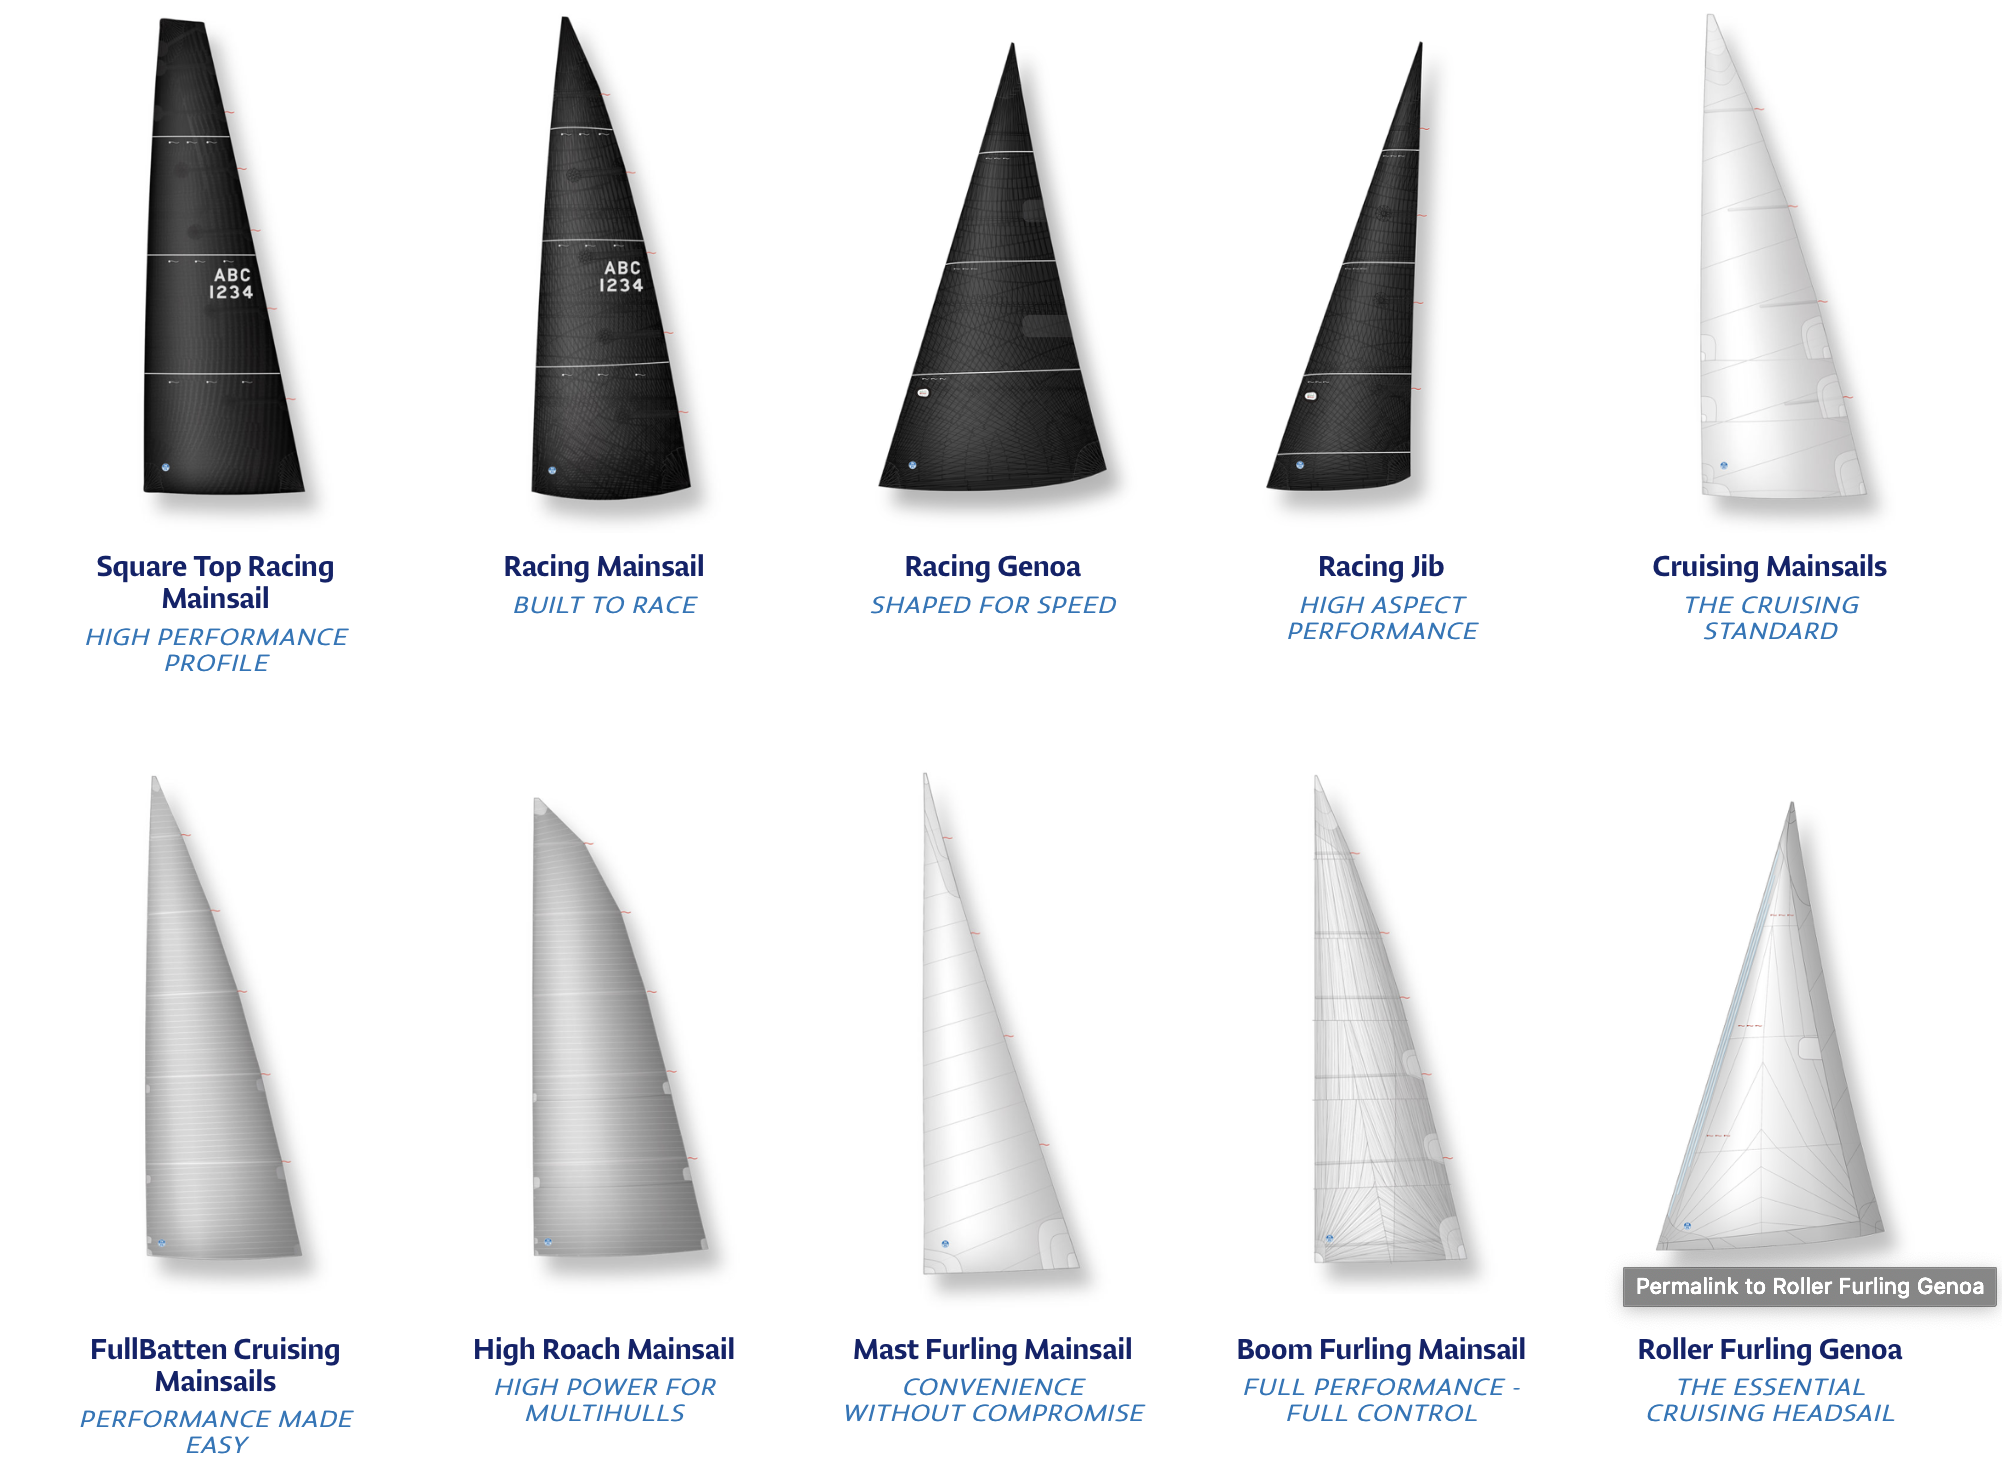
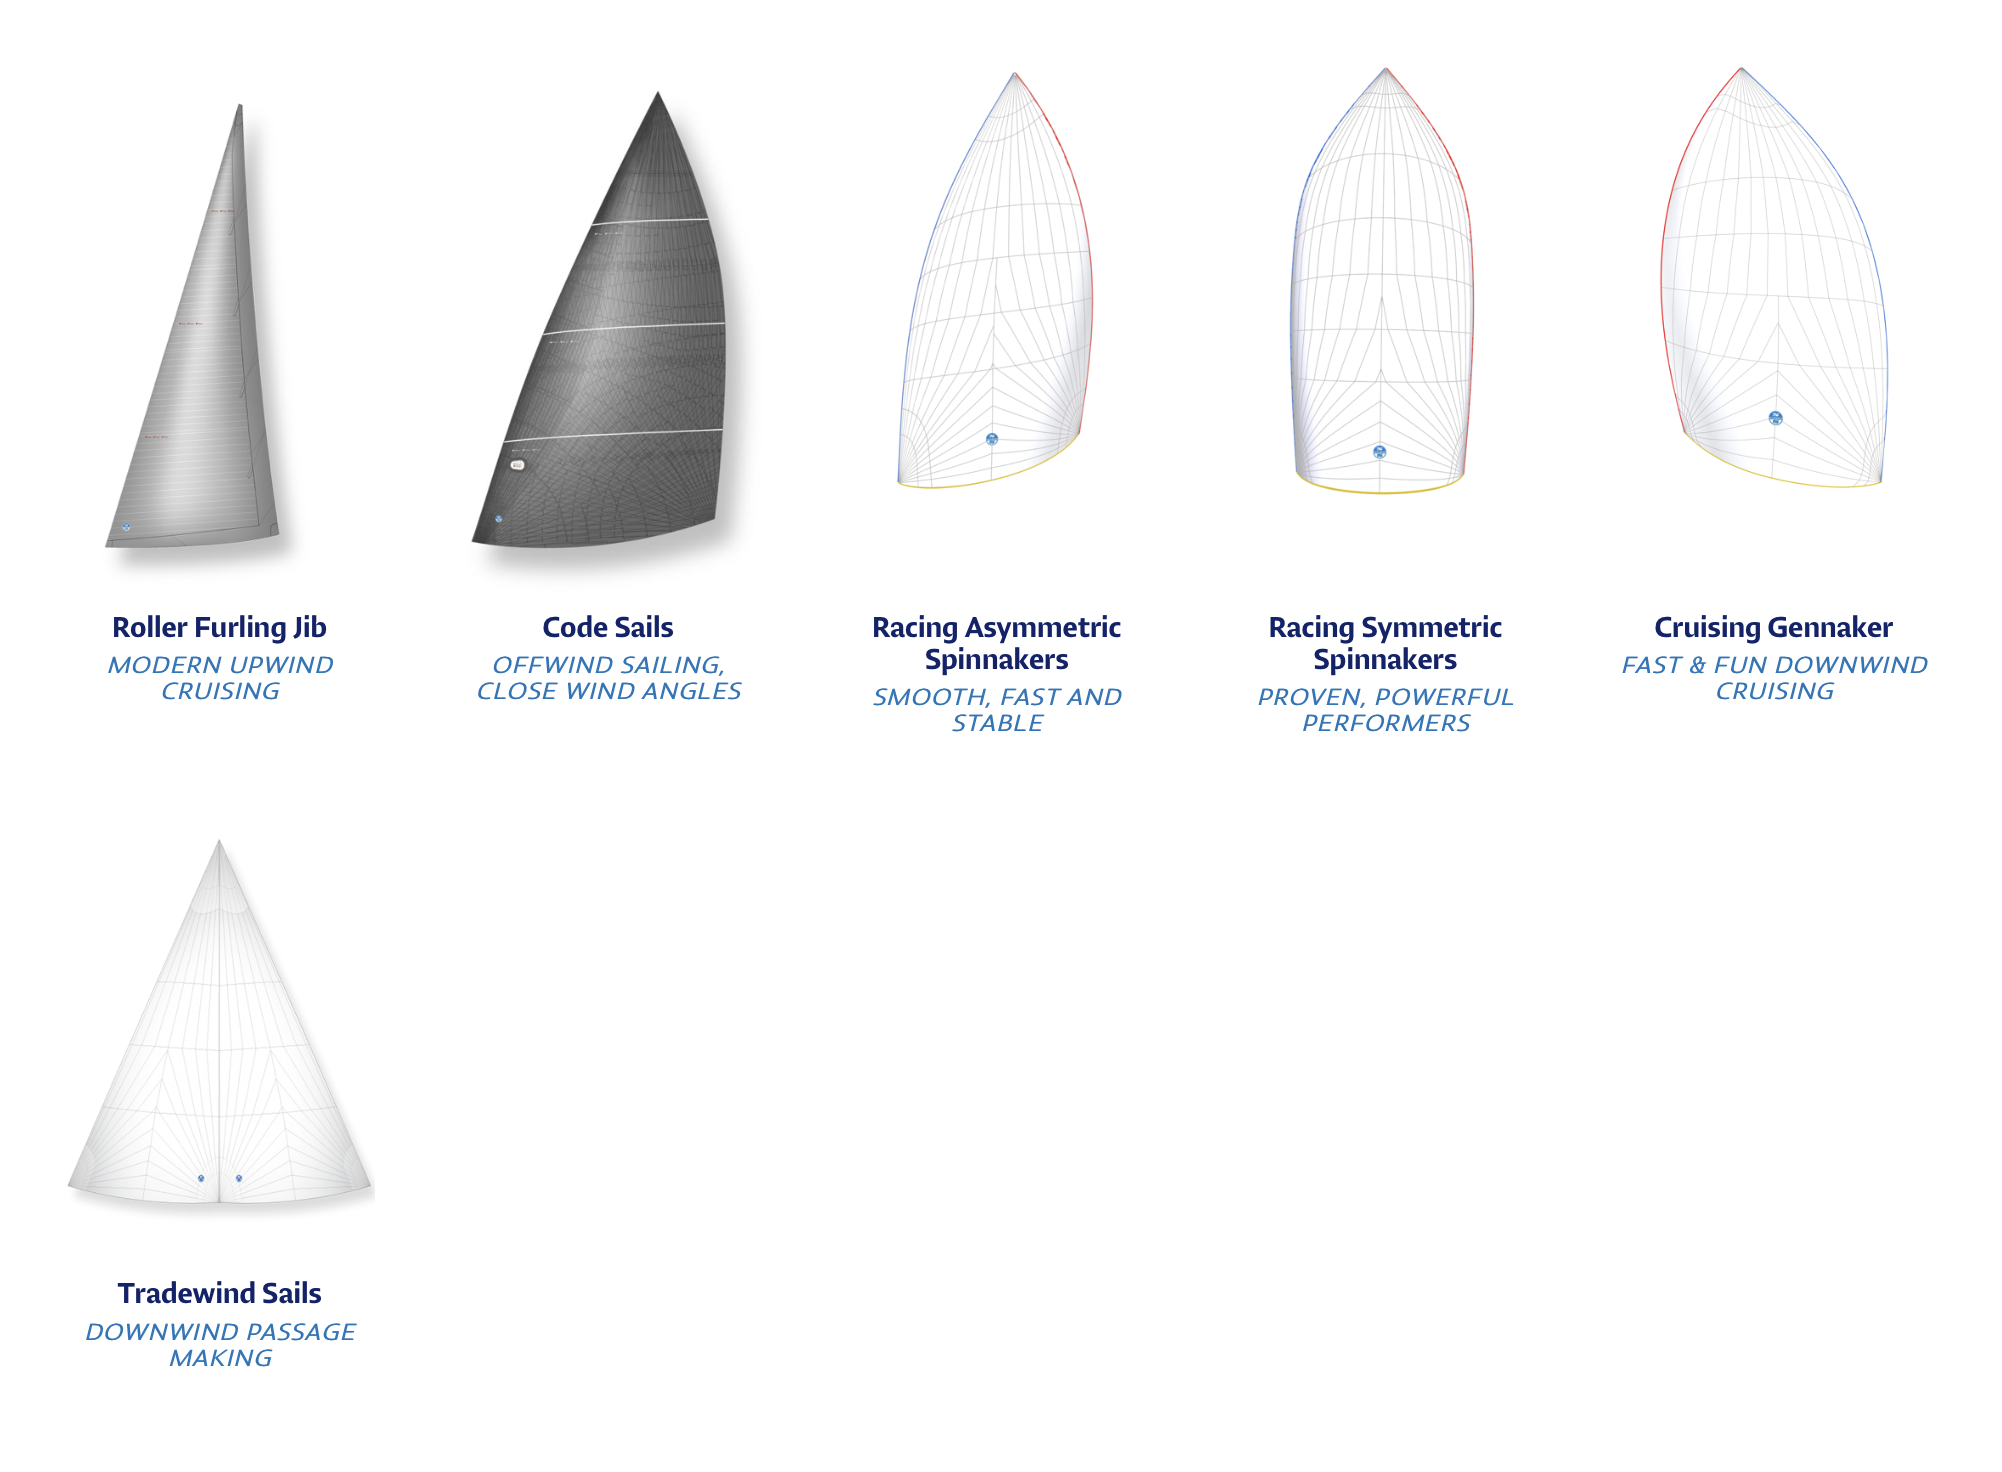
Next, we move on to the sails of the boat! There are mainly 2 sails – the main sail, and the head sail. You can see ours here:
How the sails work together to move the boats, is an entire subject on its own, and it’s known as Sailing Aerodynamics (yes, it is similar to aerodynamics).
To give you an idea, imagine opening up an umbrella in strong winds. You might feel that the umbrella is pocketing some of the wind, and that may result in the umbrella flying away, or flip it the other direction. Similarly, the sails perform the exact same tasks, which is to pocket wind, to create a force strong enough to move the vessel.
If you’re curious to know the physics behind sailing, you can watch this cute old school video (from 4:40 minutes - 5:50 minutes)!
Furthermore, there are many different types of sails that can be used, depending on the kind of speed / purpose (whether it’s for sailing races, leisure sailing holidays, or crossing oceans). The different shapes and sizes will pocket and harness the wind differently in different conditions, resulting in different speeds!
Photo from: North Sails
SAILING: WINCHES
Our catamarans – Ximula and Gracefully, are designed such that they can be managed single-handedly; 1 skipper is able to operate the sails independently with ease. This is why all our lines and winches gather towards the helm, so that they are within the skipper’s reach.
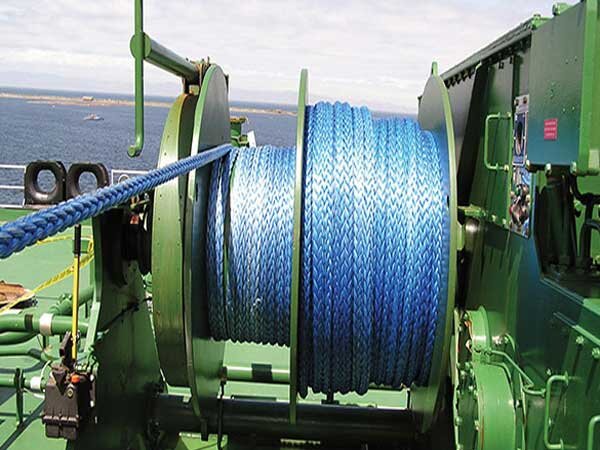
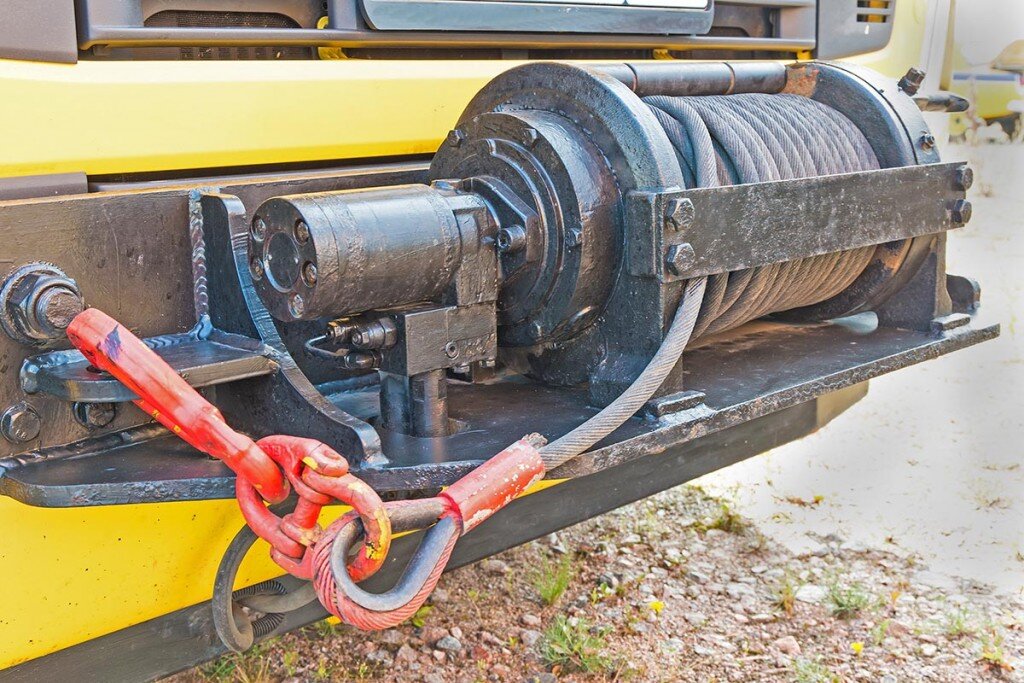
A winch is a mechanical tool that is designed to assist in pulling in or releasing rope/line. Winches are often used for heavy duty activities, from lending assistance in towing vehicles, to lifting cargo off a ship. Here’s how an average winch looks like:
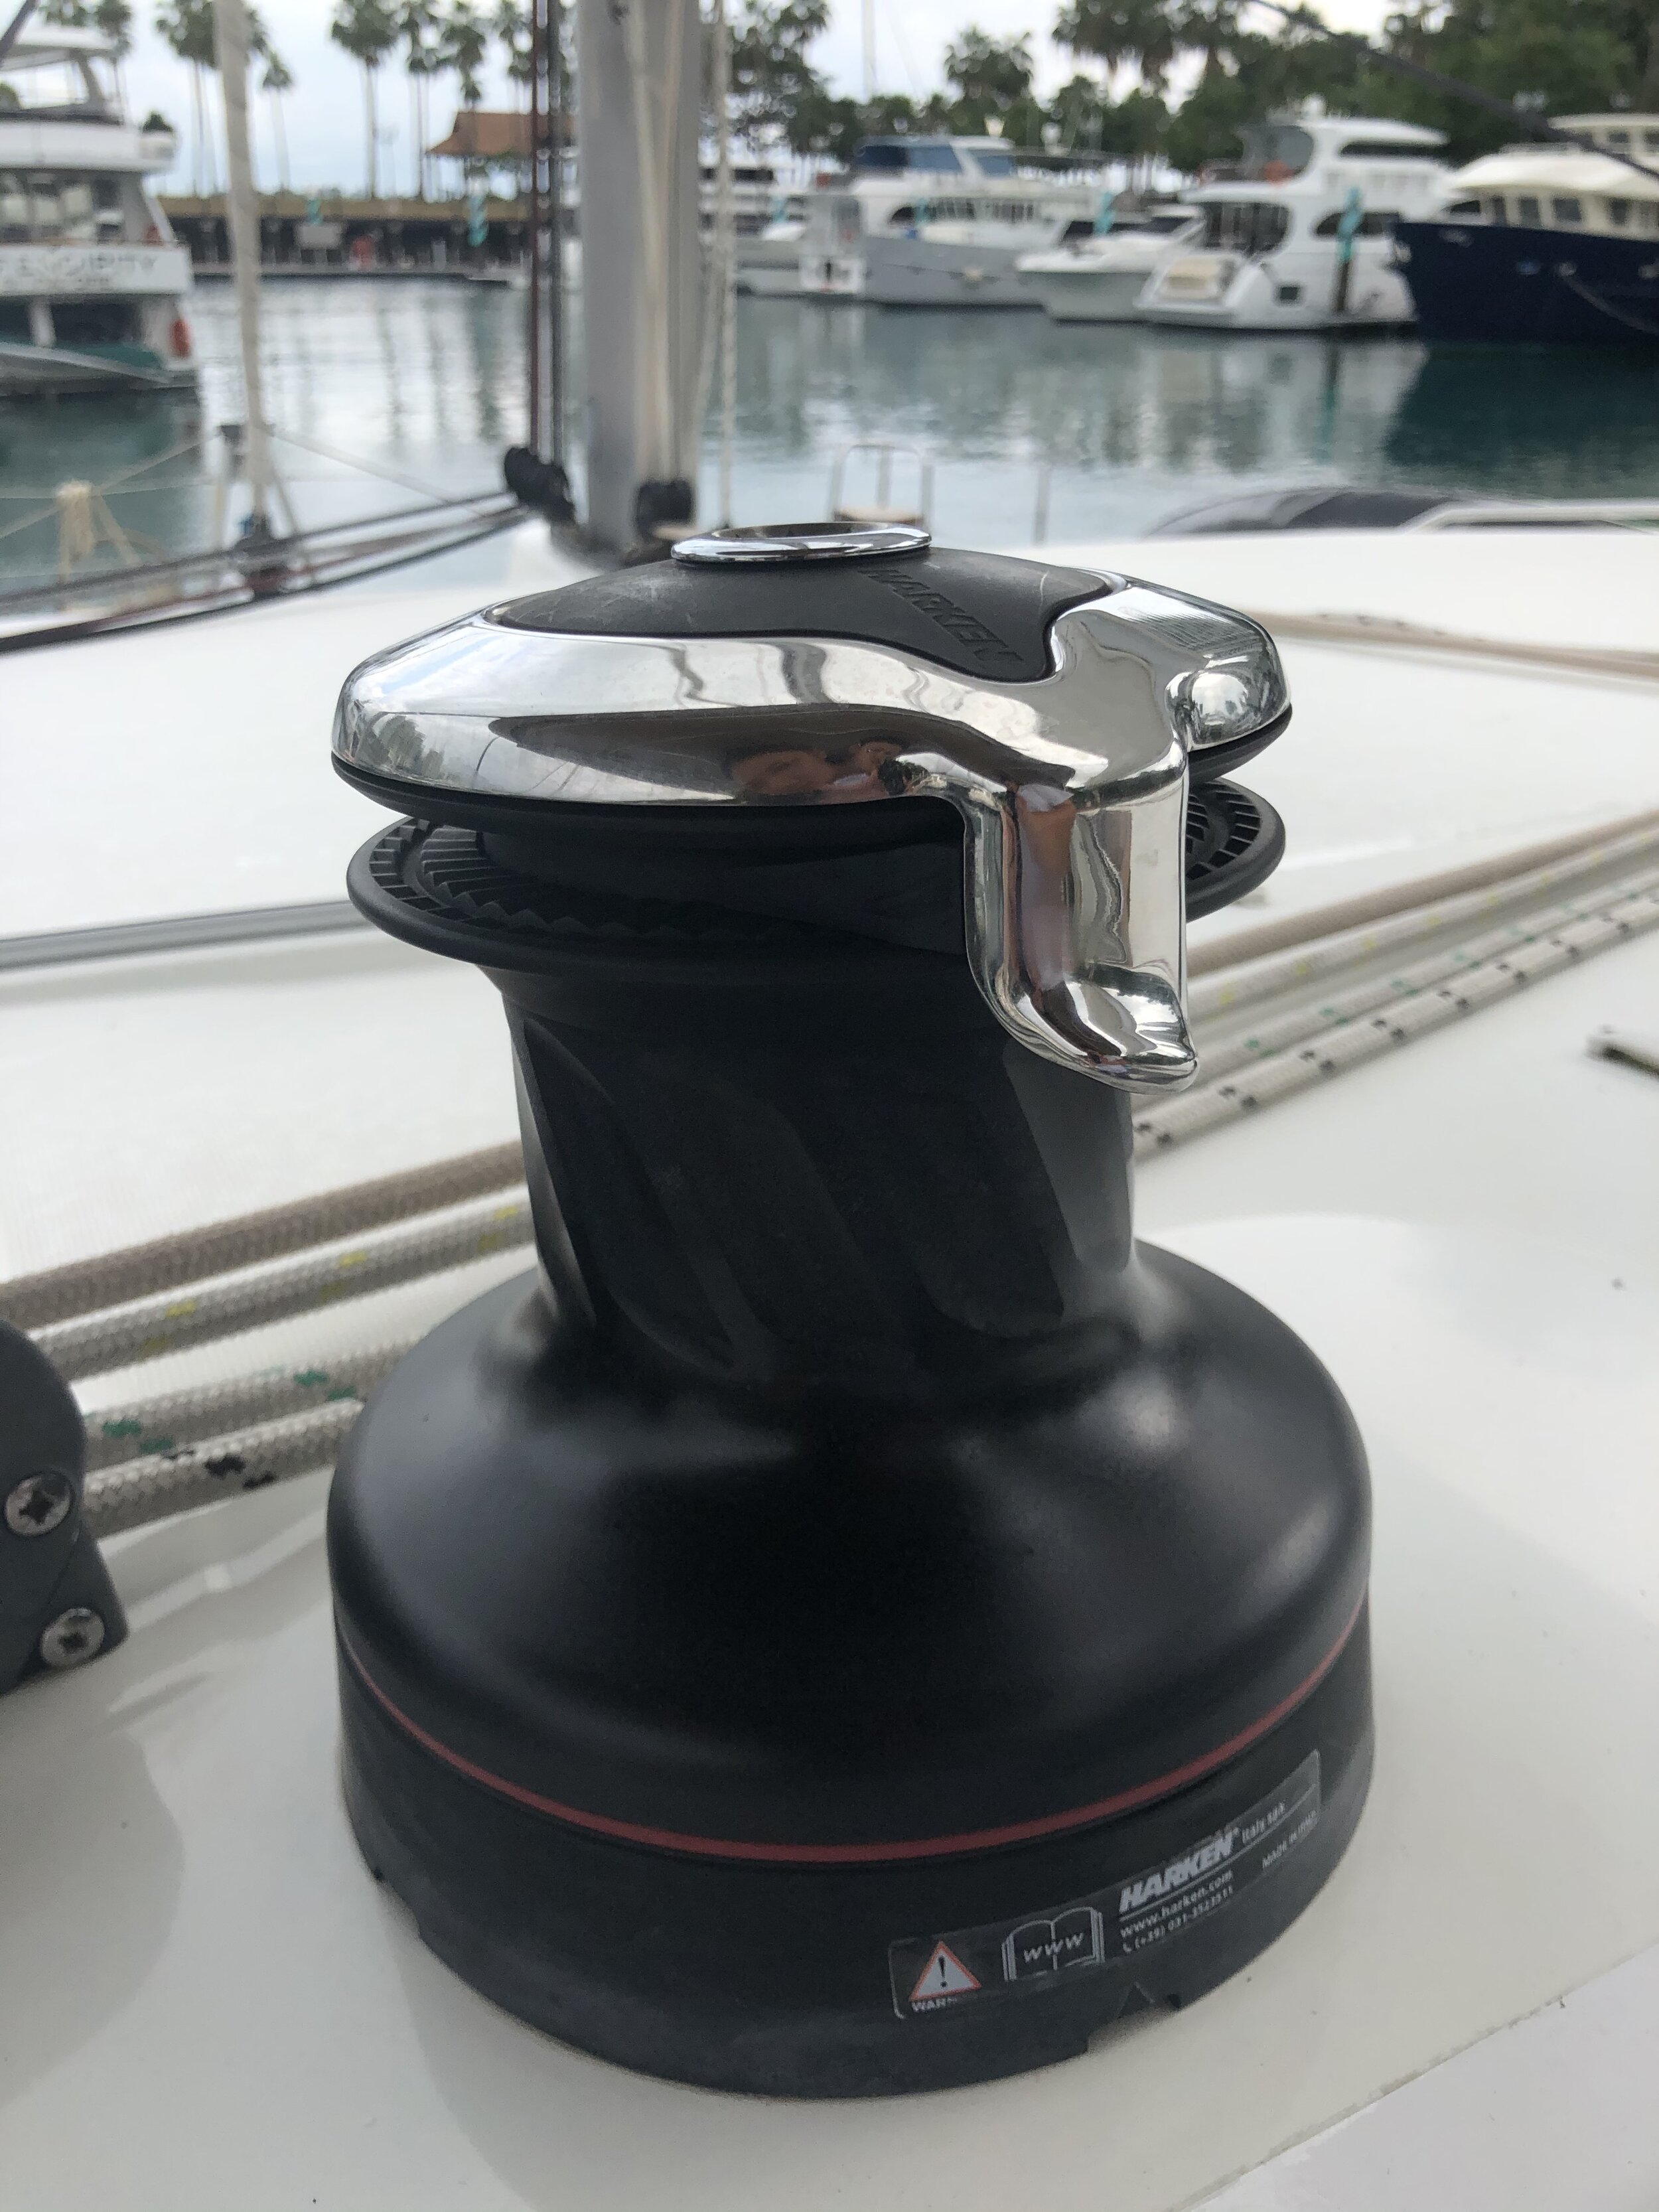
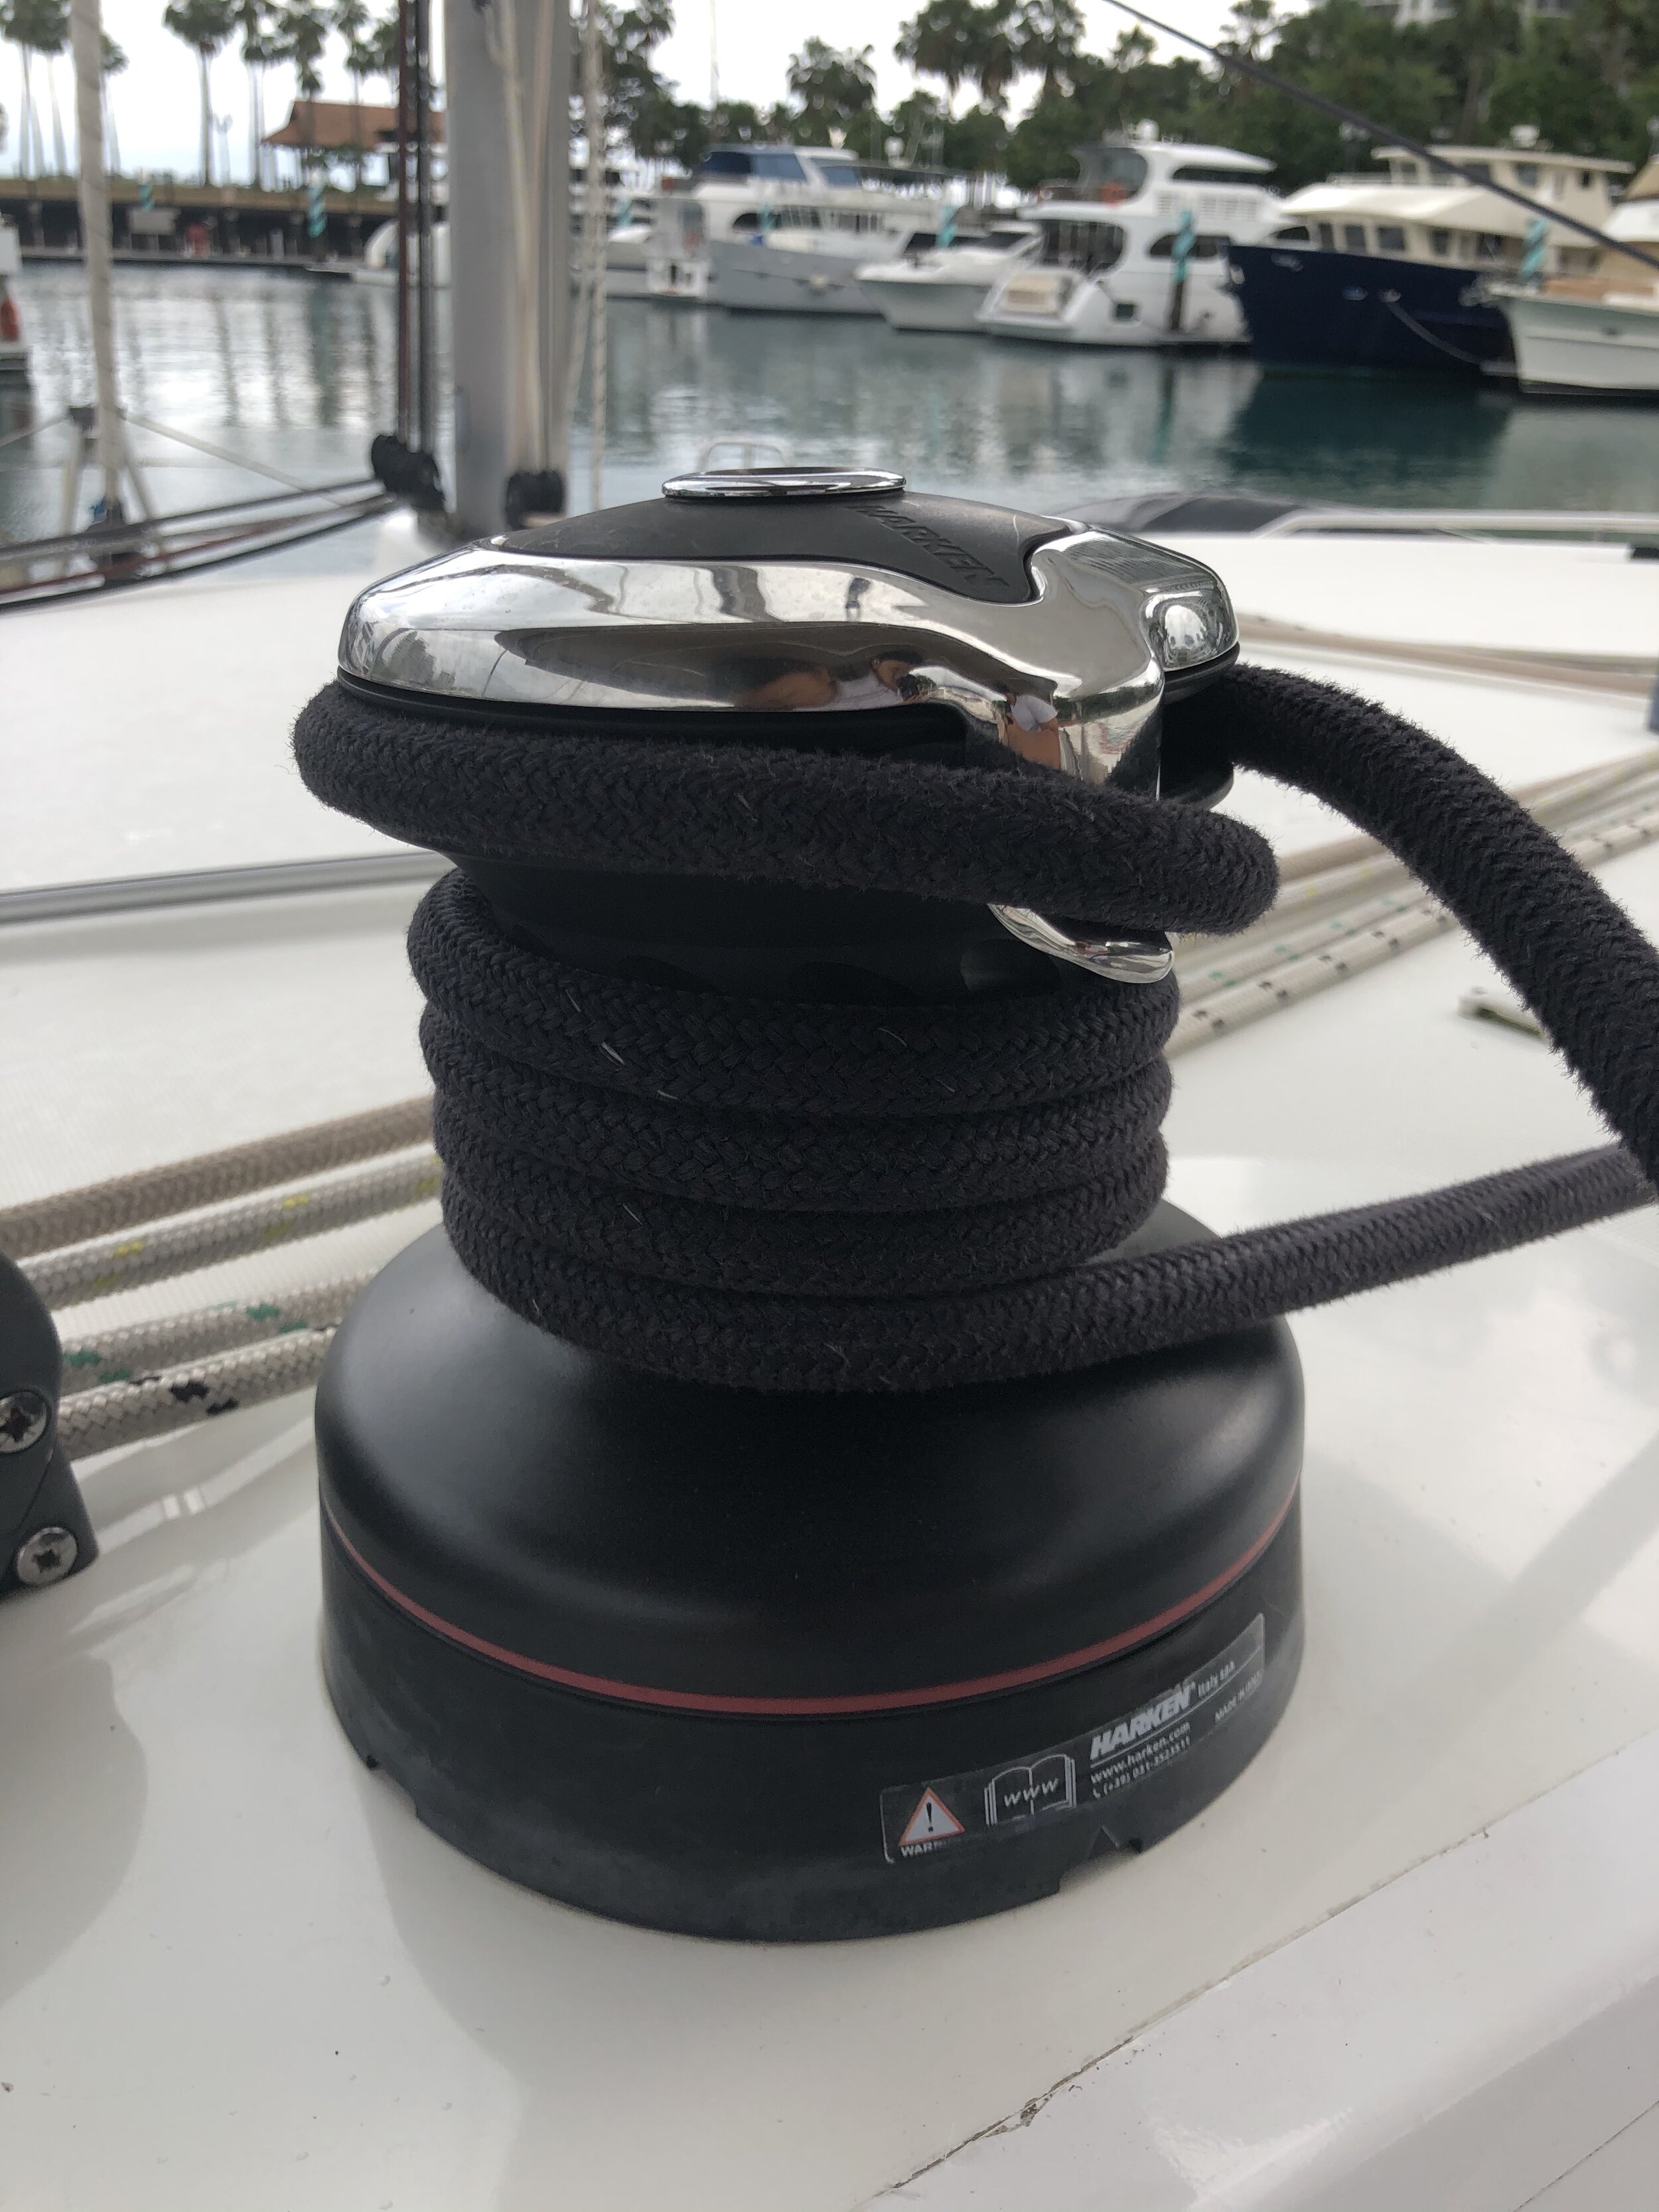
On our yachts, our winches look like this:
Looks pretty different right?
This is because of space constraints, as we need to be able to place them around our small cockpit area! And also because on a boat like ours, we don’t need something so heavy-duty.
With these electronic winches, we’re able to very effectively reel in lines quickly with the push of a button! (Before electronic winches, sailors have to manually pull lines, which may require a lot of muscle!)
The winch can still be operated manually, in the case of an electricity breakdown. All you have to do is attach a handle at the top! (P.S. all of our crew went through in house trainings to learn how to use the winches manually, and it is an understatement when we say we’re REALLY THANKFUL to have electronics.)
LINES: HalyardS & sheets
Side note: We typically call ropes on a boat ‘lines’ to indicate the purpose of the line, such as reefing lines, stern line, bow line, etc. This convey greater meaning as opposed to just ‘ropes’, which are used on ropes that are lying around and have no specific purpose on board.
Halyards (pronounced as hair-lee-yerd) and sheets are sailing lines that are utilised all over the boat.
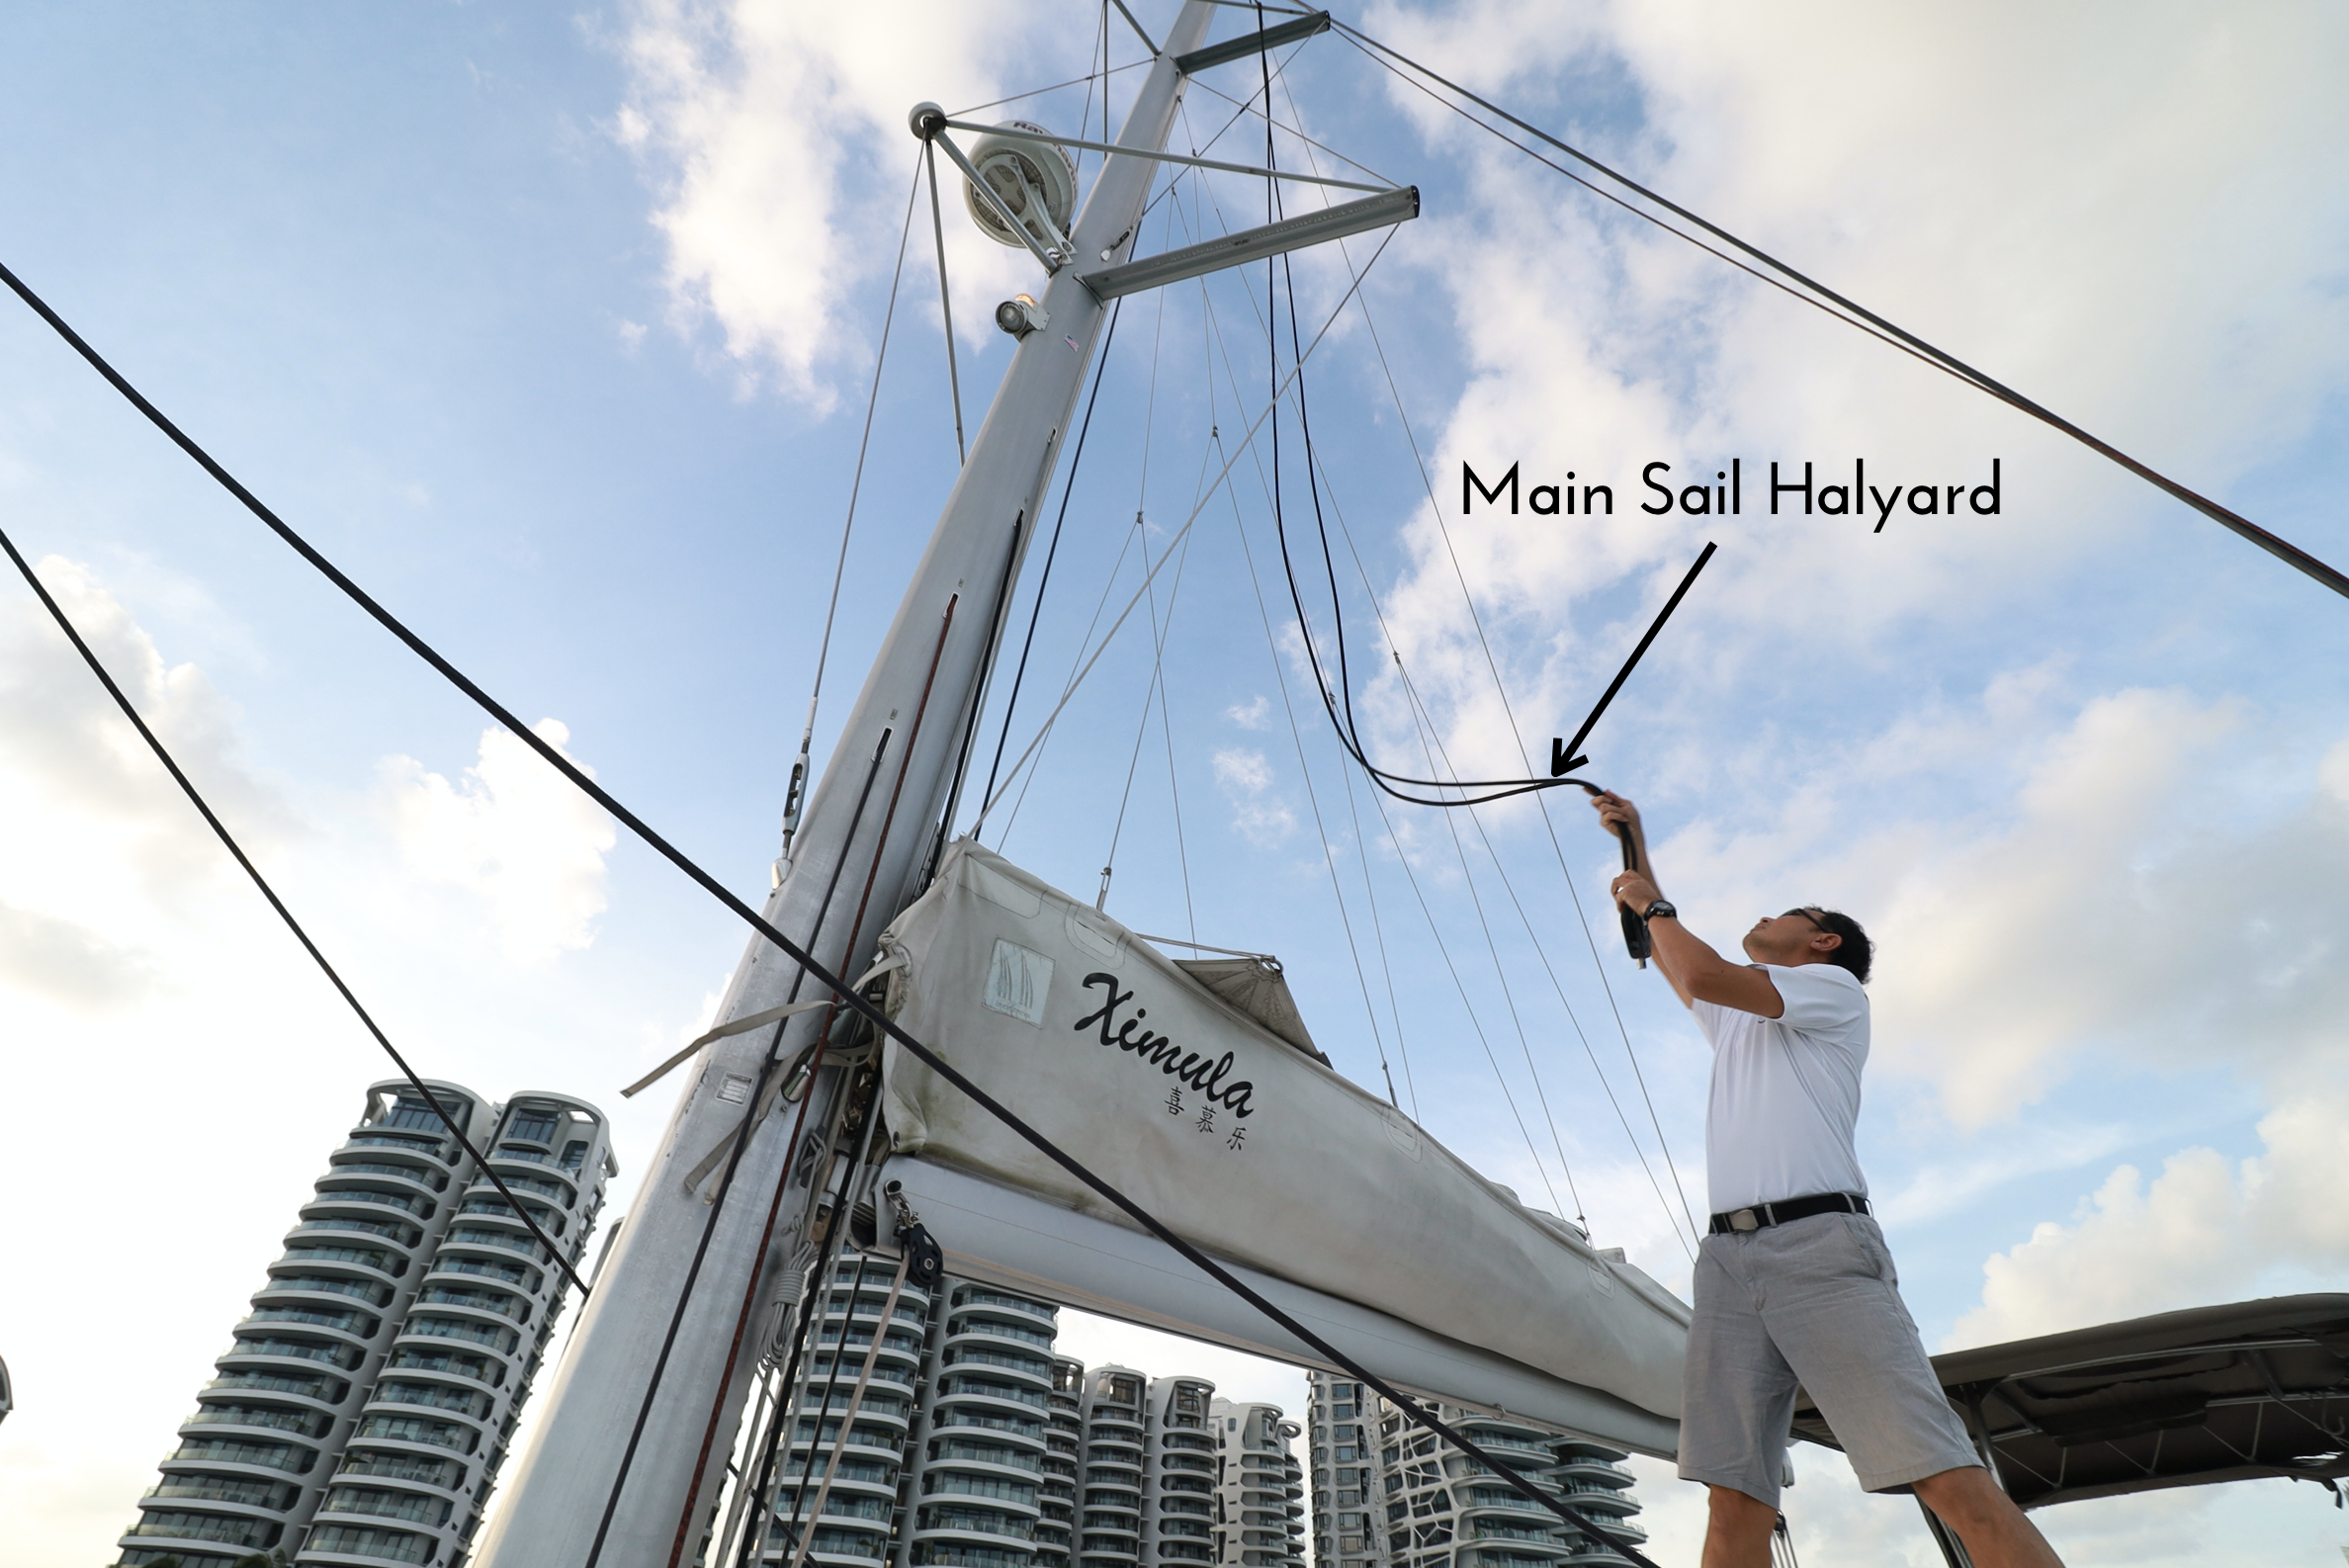
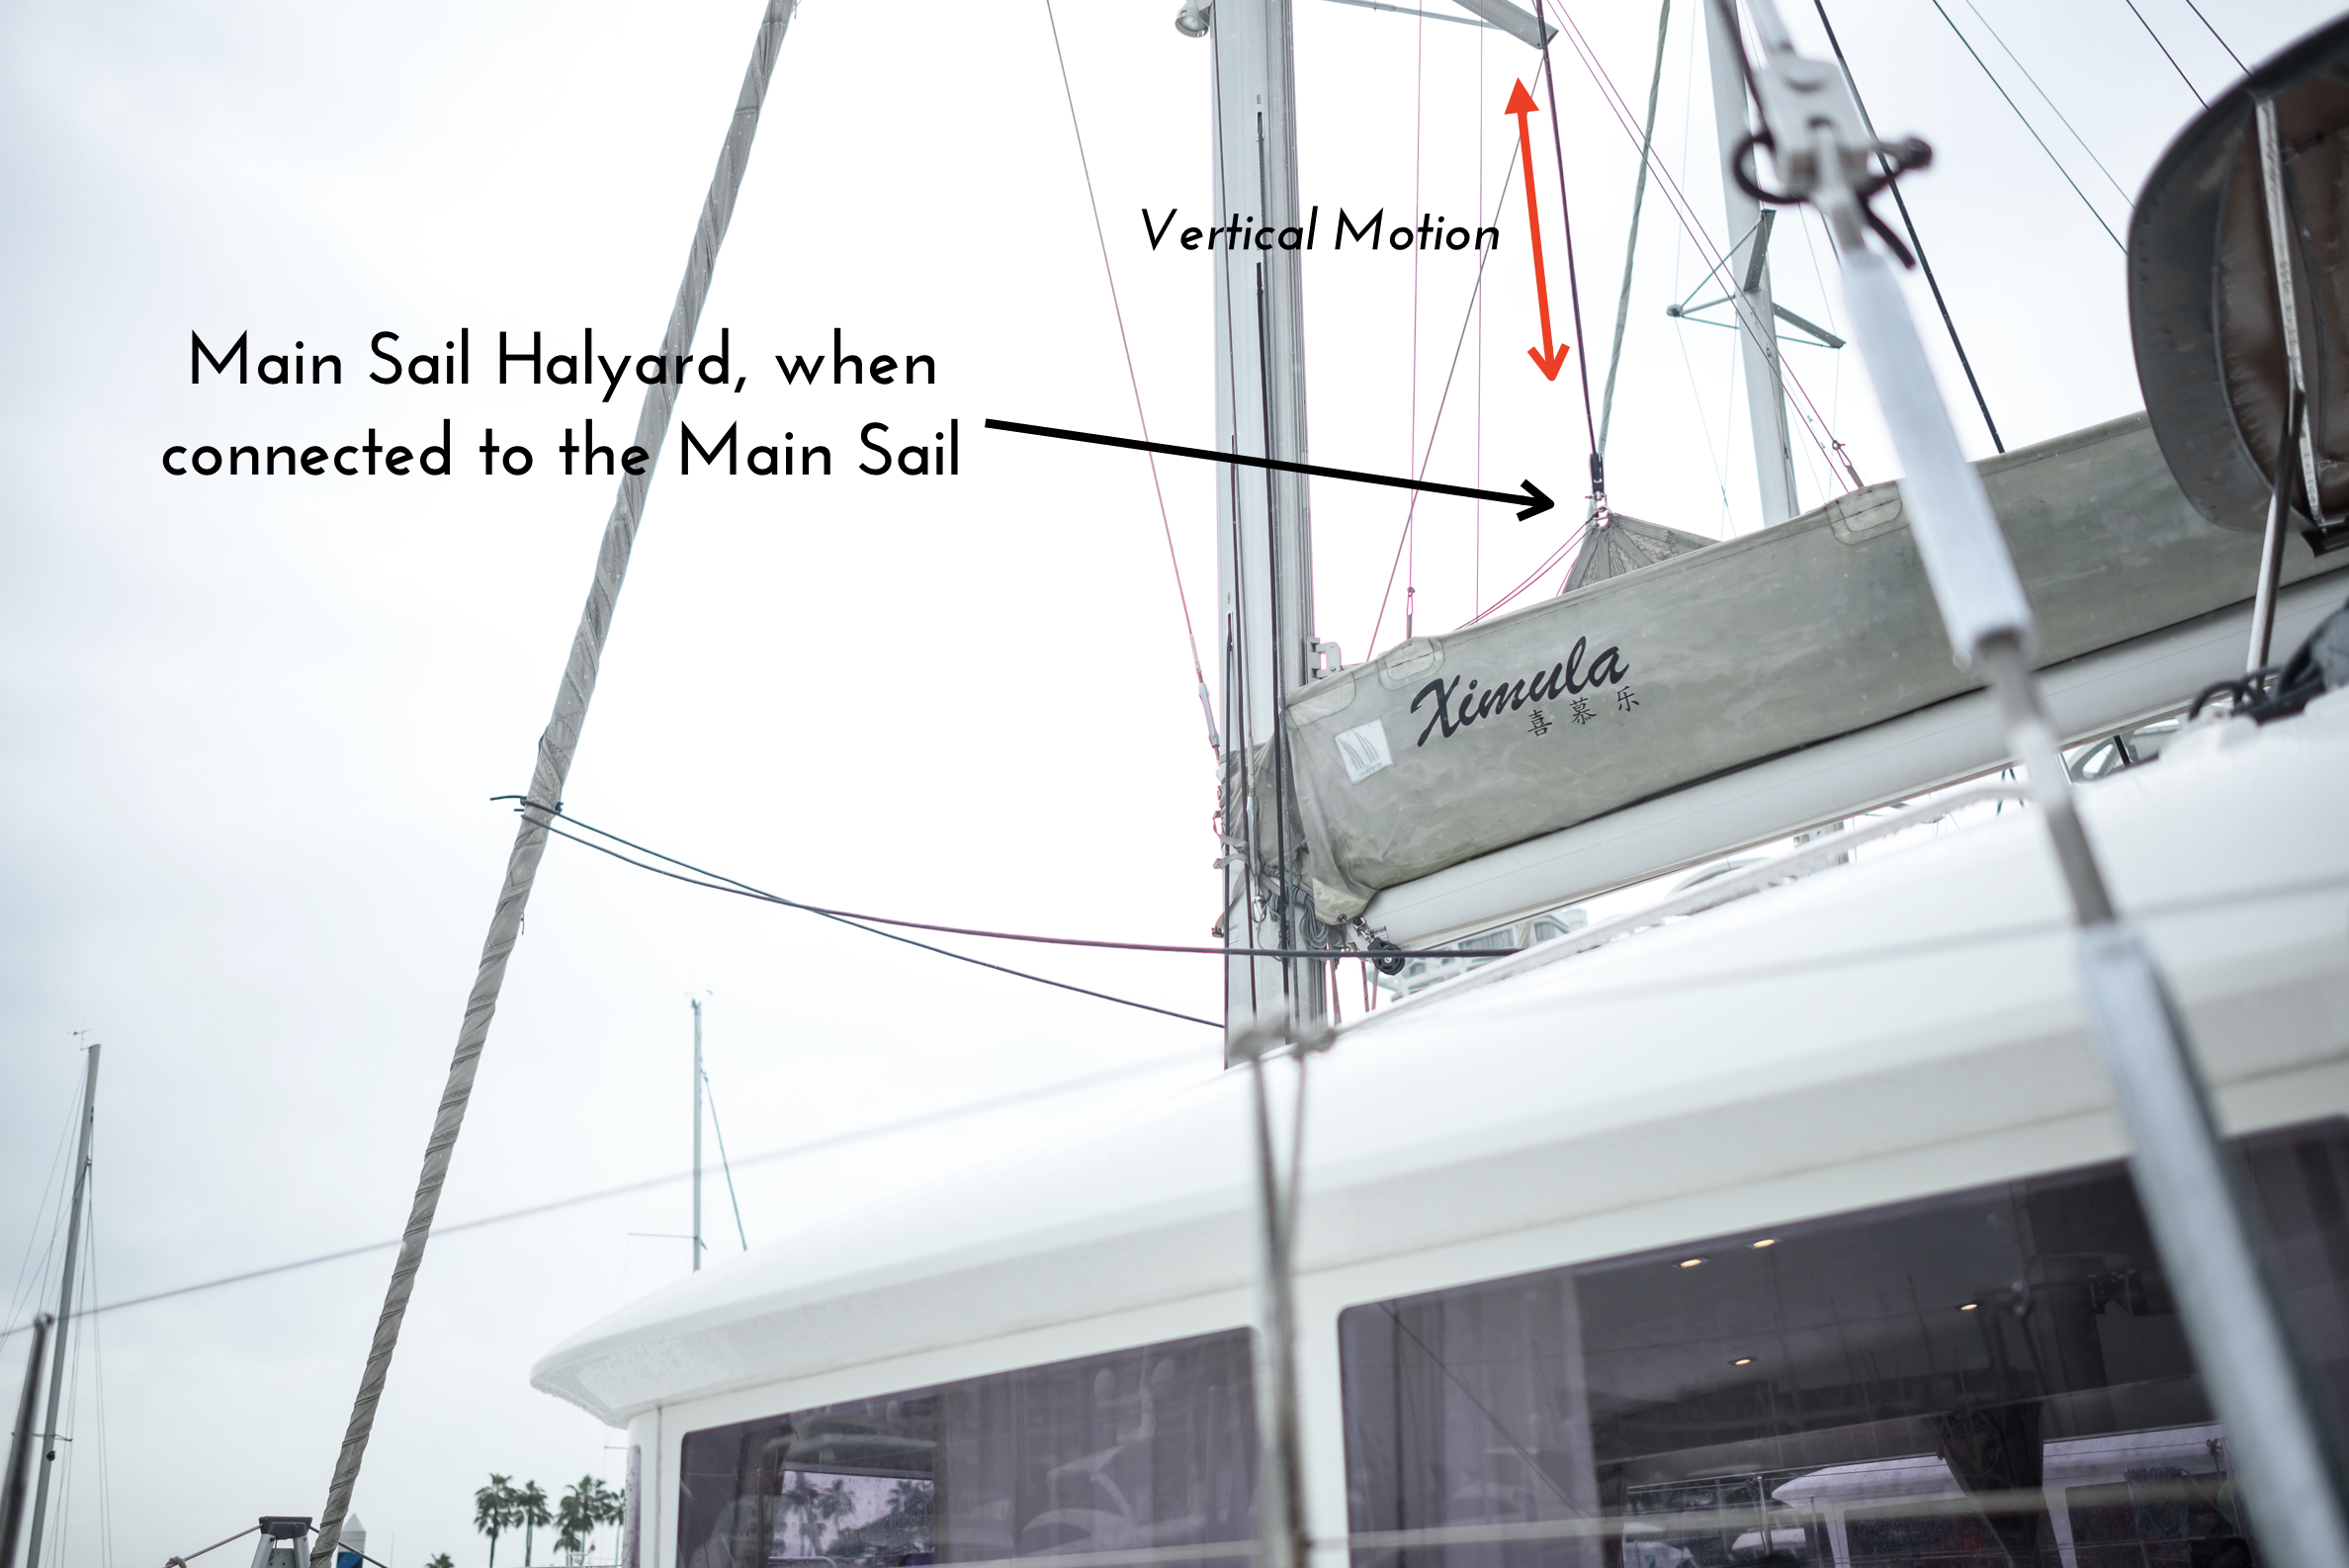
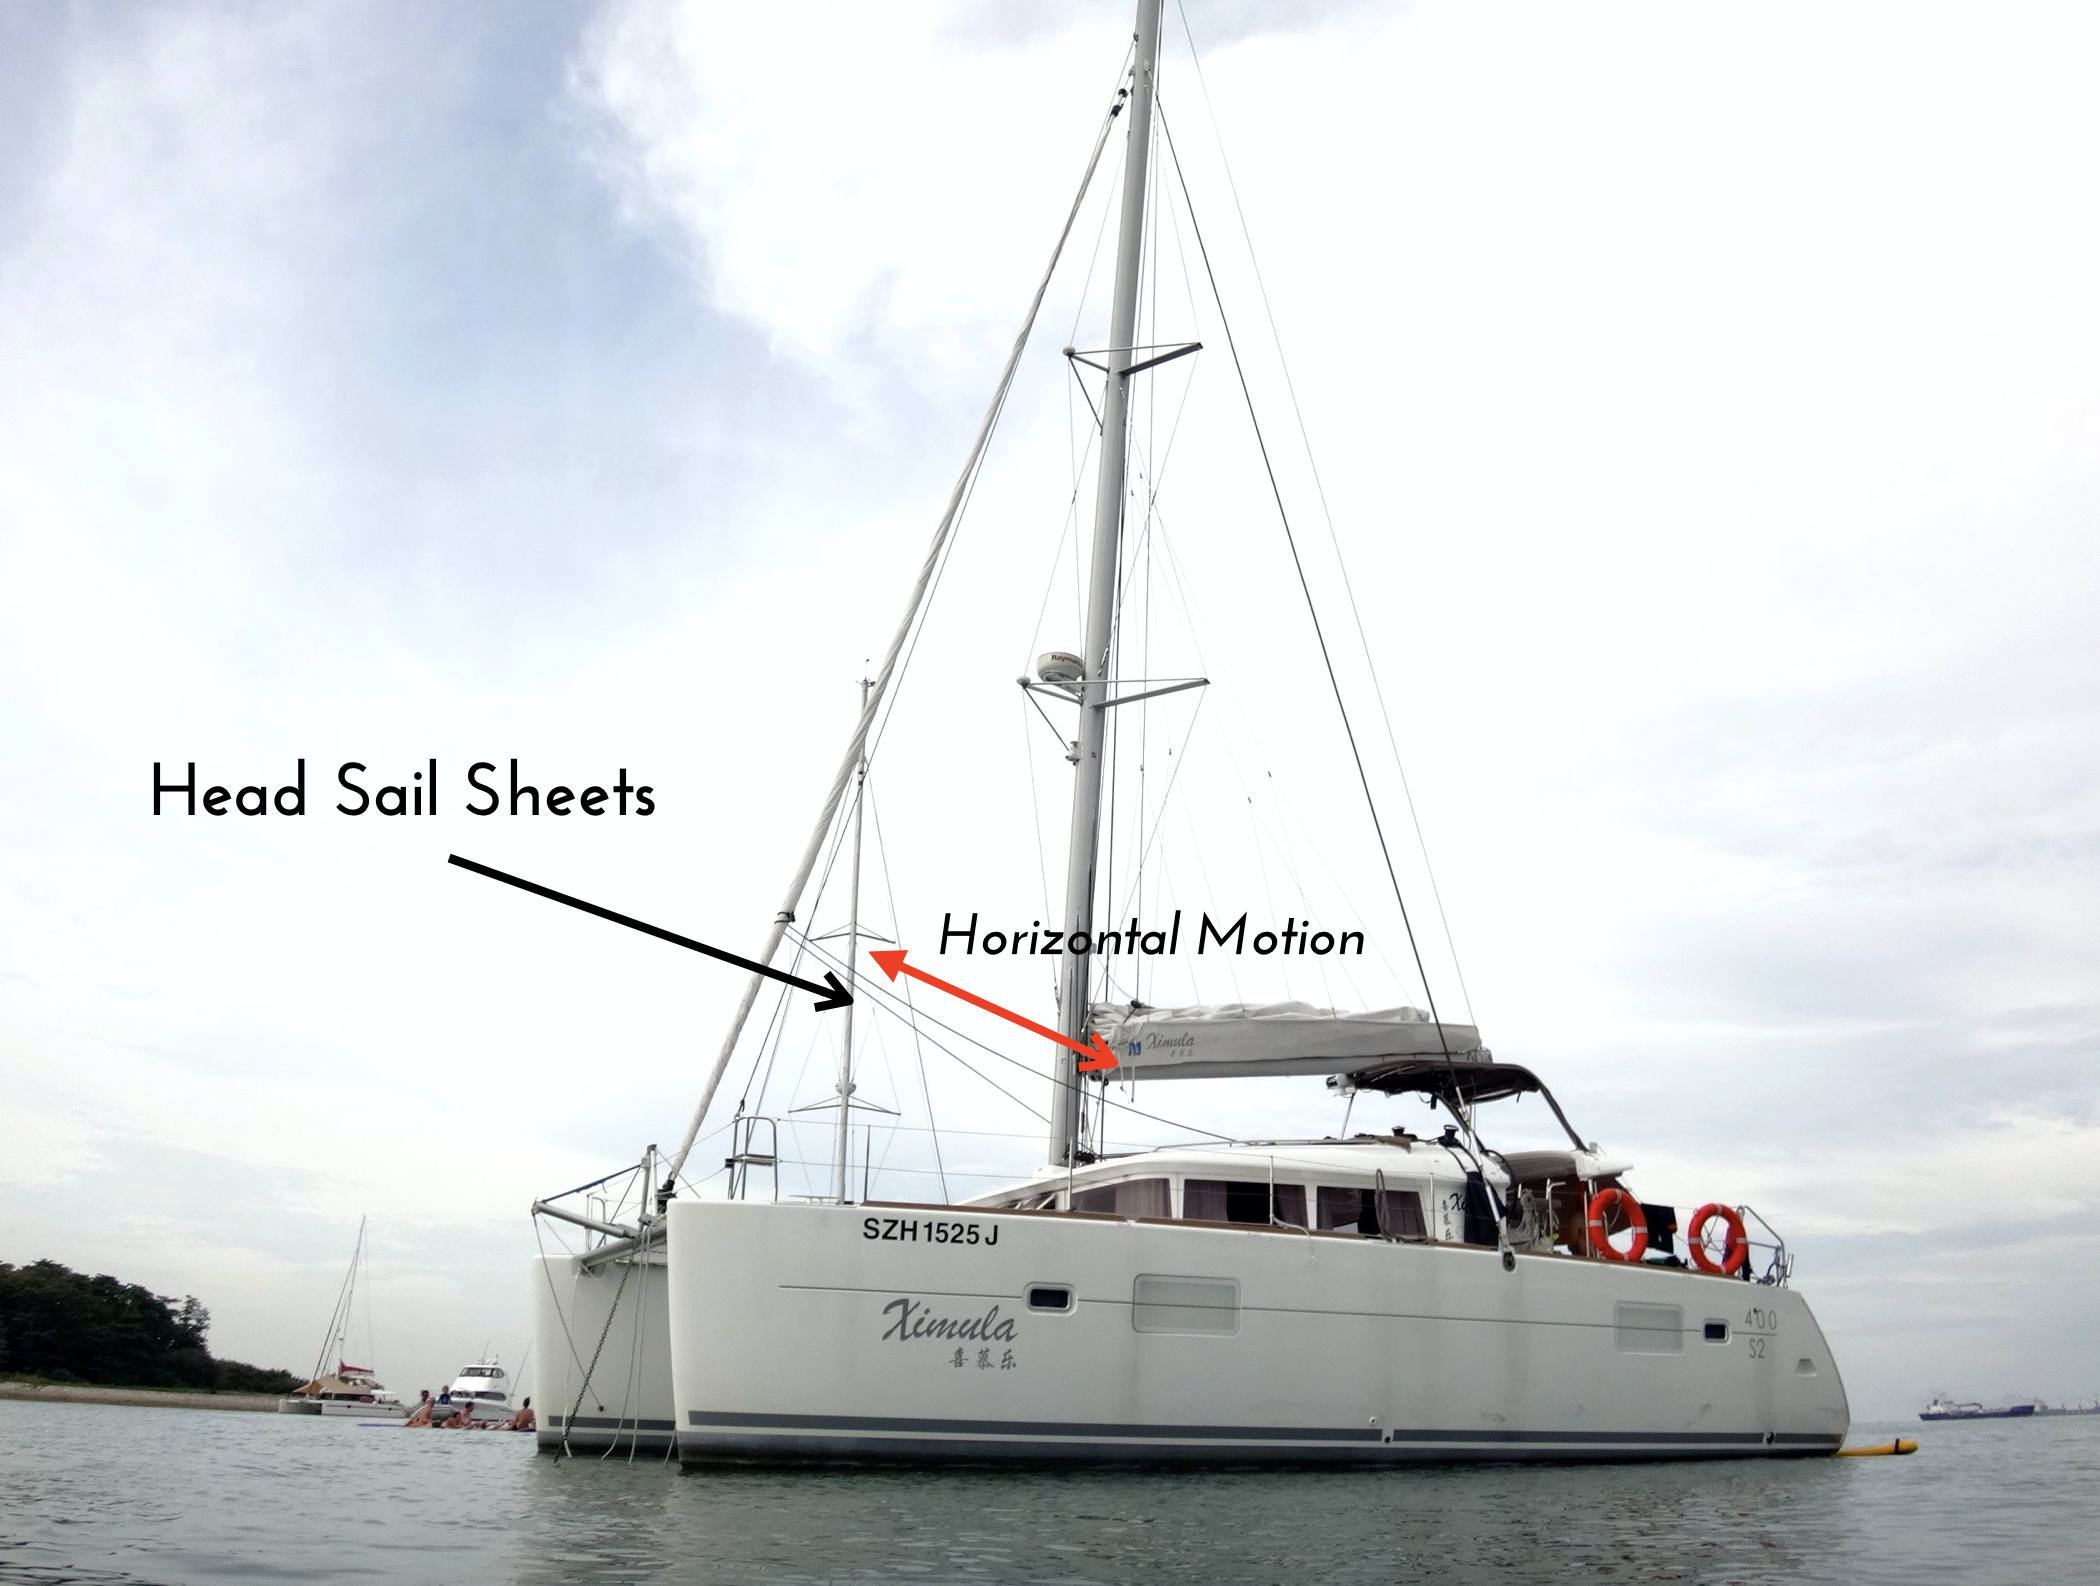
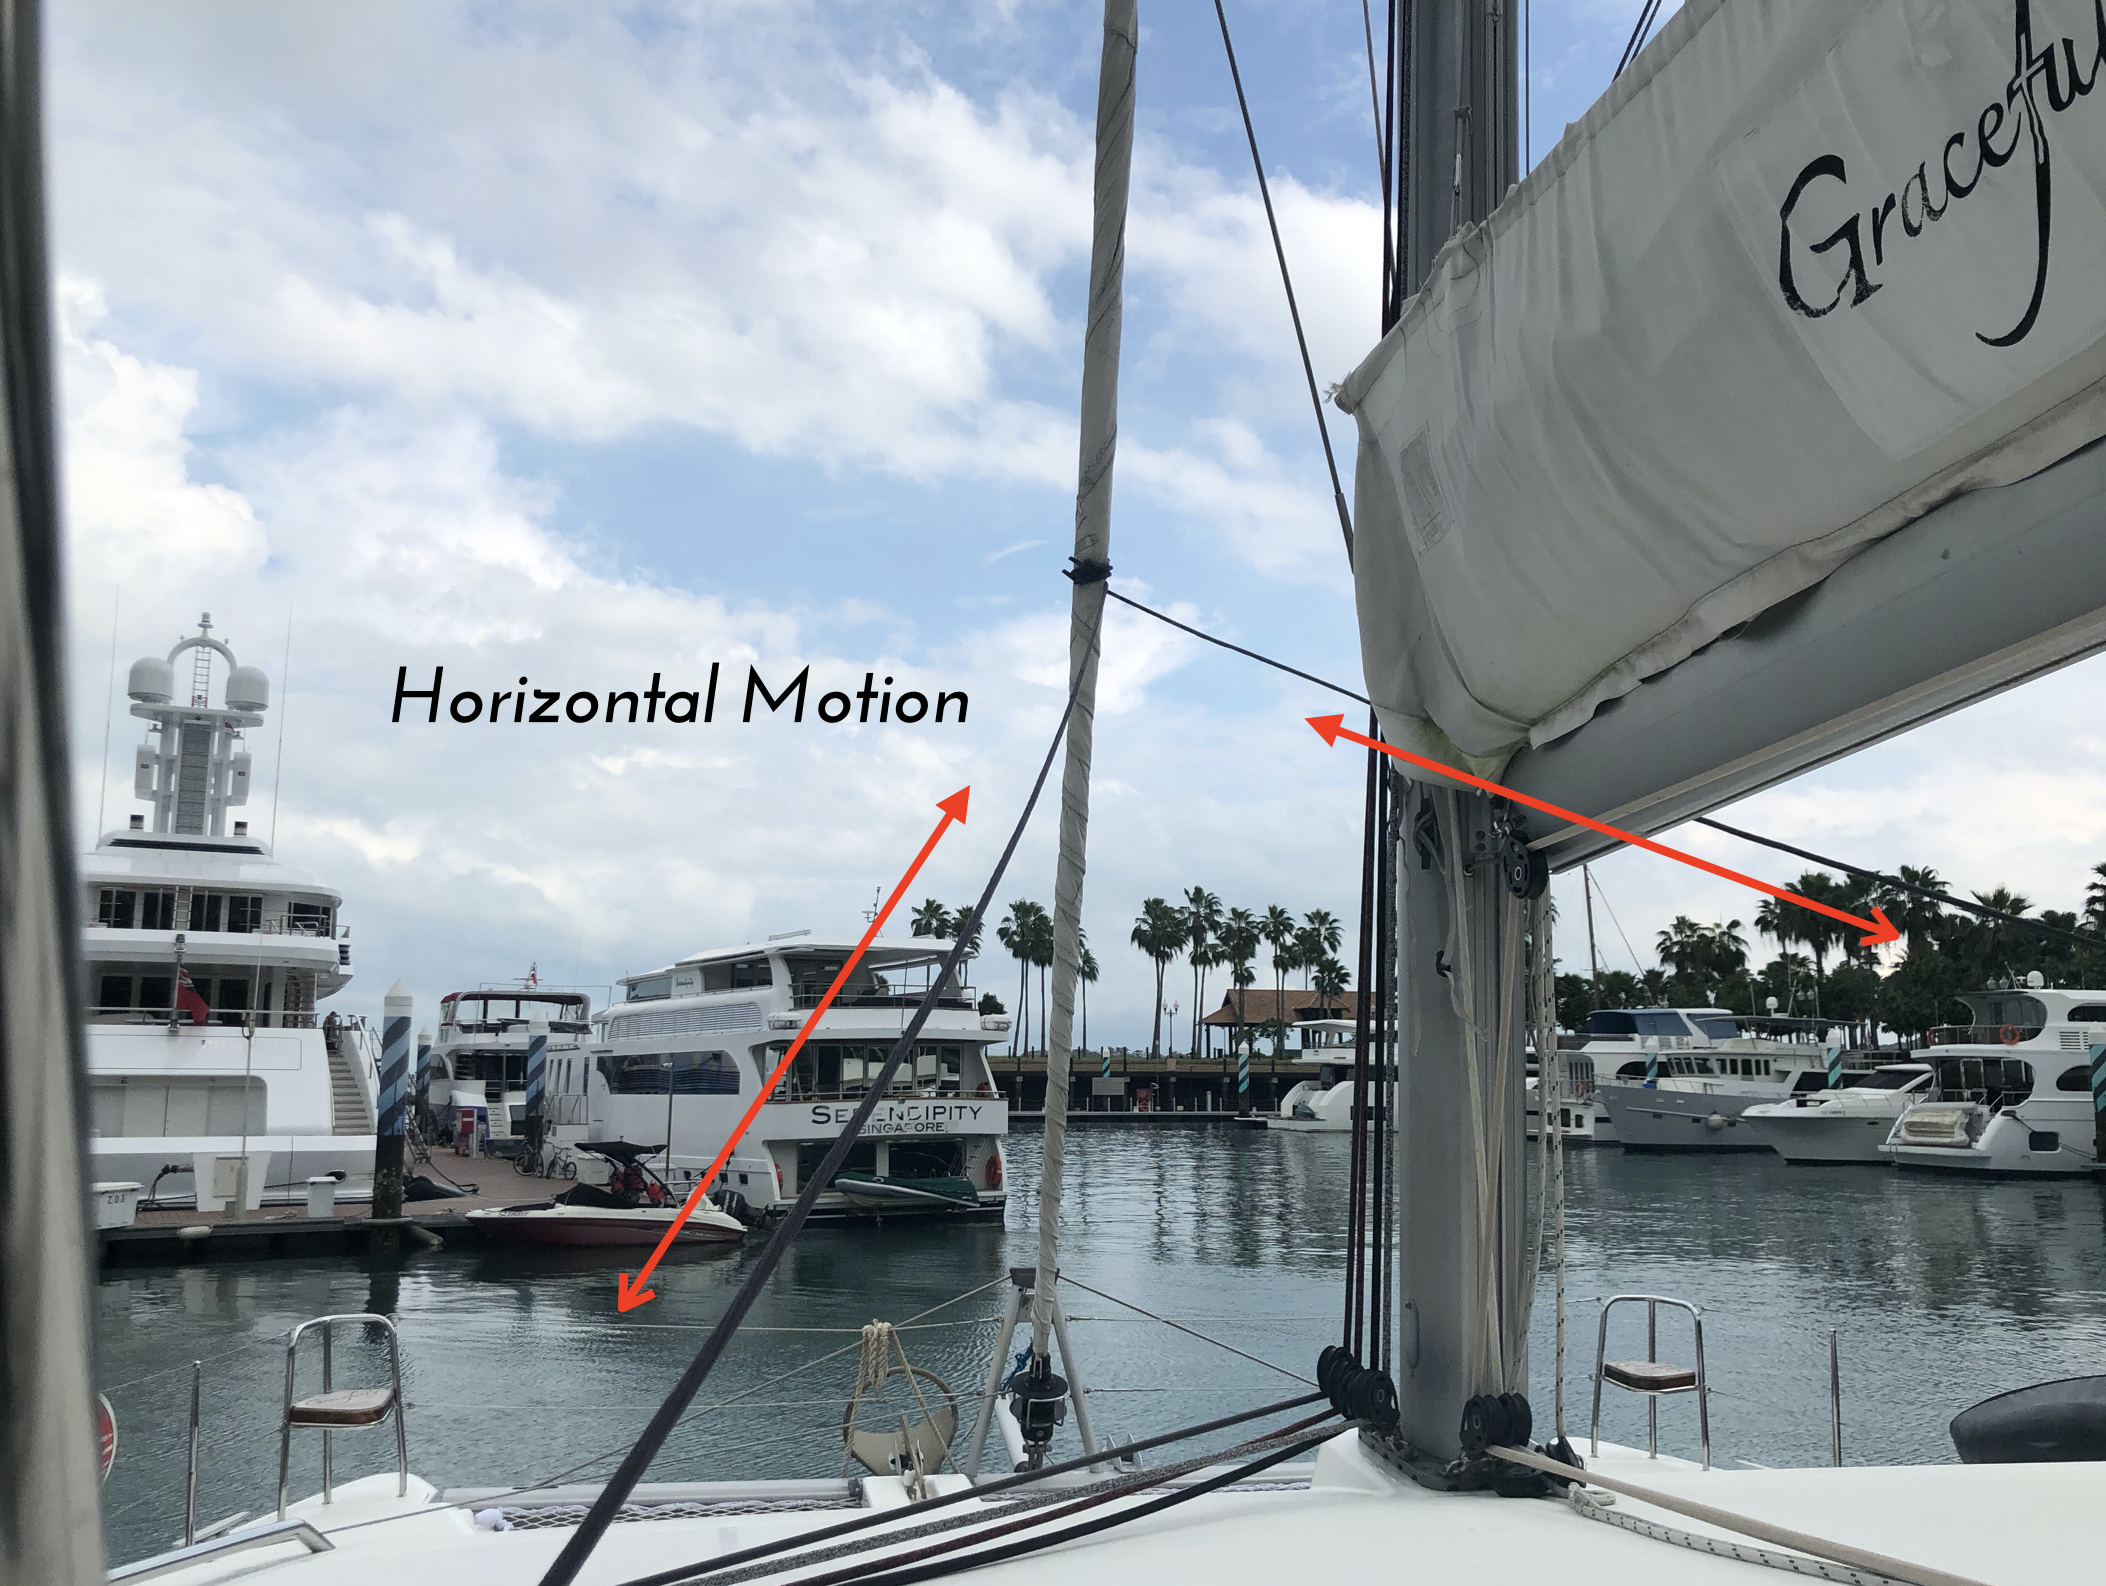
Haylards refer to any line that moves in a vertical motion (upwards and downward), and sheets refer to those that move in a horizontal motion (left and right).
For instance, the main halyard is used to hoist our main sail:
And the port & starboard sheets attached to our head sail:
Lines: furling line
When we want to use our main sail, you’d hear us say “Let’s hoist the main sail”. The term “hoist“ is relatively easy to understand. But what about the head sail? For that, you’d hear “Standby to unfurl the head sail.”
So how do we actually open up the head sail? To help you understand, we must first know 3 parts:
Our head sail is basically rolled around the furling pole.
To unfurl it, here’s what we have to do:
Lay out the furling line.
Wind both the head sail sheets onto winches respectively.
Check the wind direction, and decide on the side in which you’d want to open it from.
For instance, if the wind is coming from your port side, the head sail should open towards the starboard side (we’ll use this as an example for the steps).
Winch the starboard sheet in, while pulling the port sheet in at the same time.
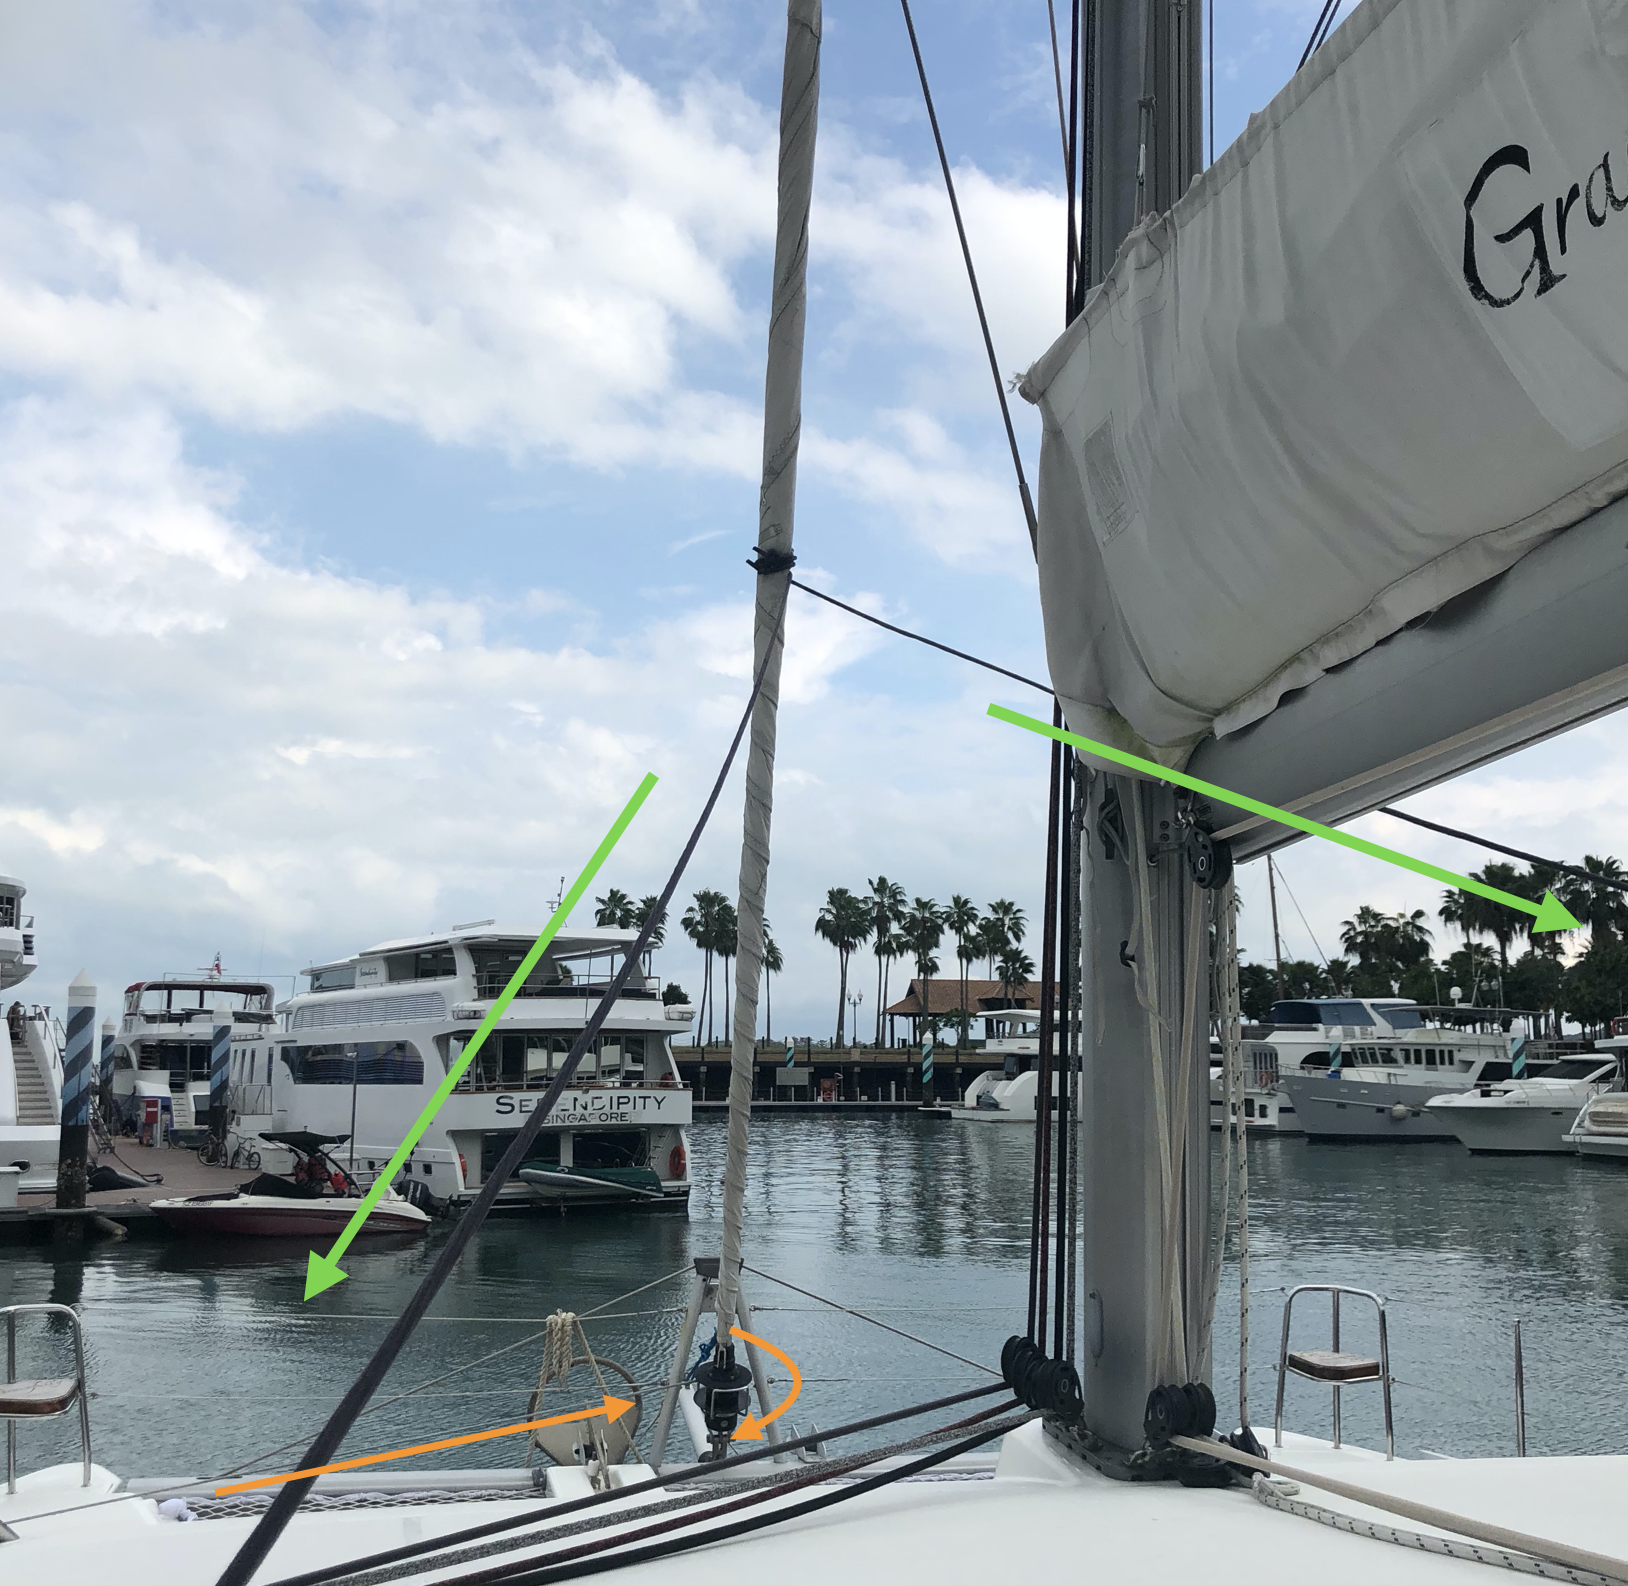
As the starboard sheet is being reeled in, the entire furling pole will start rotating, including the furling drum, coiling the furling lines.
Try visualising how it would be like, with this image:
Does it make sense to you? (If it doesn’t…. wanna come sail together with us? 🤓)
Lines: Reefing Lines
Reefing lines are lines that are attached to our main sail at different heights.
While we’re out sailing, we’re sometimes met with very strong winds, that can potentially damage our mast. Reefing lines allow the skipper to lower the main sail during strong winds to allow a partial amount of wind to pass, hence reducing the amount of wind that is pocketed. It is important to reef down, as pocketing too much wind may overpower the boat causing the skipper to lose control, or potentially break the boat’s mast.
For our catamarans, we use a set of guidelines to decide when to reef. We’ll usually bring down the first reef once the wind picks up to 25 knots. (In Singapore, the strongest wind that we have faced came up to about 40 knots.) Sometimes, the decision to reef is also the skipper’s discretion based on the number and condition of guests on board, his observations of any weather changes, etc.
When you come sail with us, you may hear us saying “bring down the first reef!”… now, you know what that means!
And here you have it! Some of the basic nautical terms we think a curious sailor might want to be familiar with. We’ll share more about sailing in our next nautical note!


